Replacing Exterior Light Bulbs
The exterior lights have either LEDs or normal bulbs.
LED type
-
Headlights (type A)
-
Headlights/Daytime running lights (type B)
-
Front turn signal lights (type A)
-
Daytime running lights/Parking lights (type A)
-
Front side-marker lights (type A)
-
Signature wing illumination (type A) (Some Models)
-
Fog lights (Some Models)
-
Brake lights
-
Taillights
-
High-mount brake light
-
Side turn signal lights
-
Rear side-marker lights
-
License plate lights
The LED bulb cannot be replaced as a single unit because it is an integrated unit.
The LED bulb has to be replaced with the unit. We recommend an Authorized Mazda Dealer when the replacement is necessary.
Bulb type
Front turn signal lights (type B), Parking lights/Front side-marker lights (type B)
When replacing a bulb for the front turn signal lights and parking lights/front side-marker lights, turn the steering wheel and change the direction in which the tires are pointed to the position where the bulb replacement can be done easily.
Turn the steering wheel after starting the engine and stop the engine after you finish turning the steering wheel.


-
If you are changing the right bulb, start the engine, turn the steering wheel all the way to the right, and turn off engine. If you are changing the left bulb, turn the steering wheel to the left, and turn off engine.
-
Make sure the ignition is switched off, and the headlight switch is off.
-
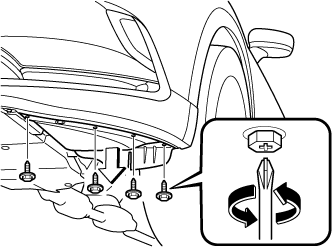
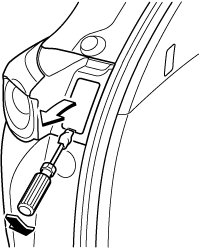
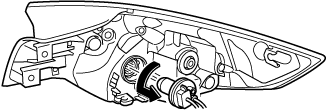
Turn the screw counterclockwise and remove it.
-
Pull the center of each plastic retainer and remove the retainers, and then partially peel back the mudguard.
-
Disconnect the wiring harness by releasing the clamp.
-
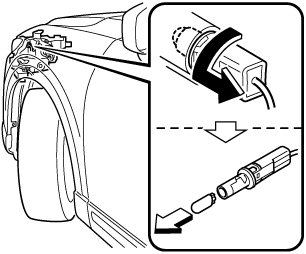
Turn the socket and bulb assembly counterclockwise and remove it.
-
Disconnect the bulb from the socket.
Front turn signal lights
Parking lights/Front side-marker lights
-
Install the new bulb in the reverse order of the removal procedure.
There will be no problem with functionality with the wiring harness disconnected in Step 5 left disconnected.
Therefore, there is no need to connect the wiring harness.
Rear turn signal lights
-
Make sure the ignition is switched off, and the headlight switch is off.
-
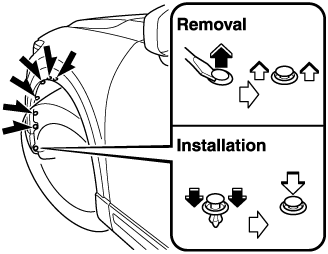
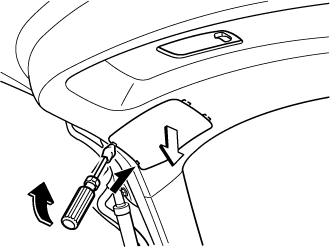
Remove the cover.
-
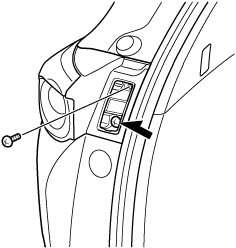
Turn the screws counterclockwise and remove them.
-
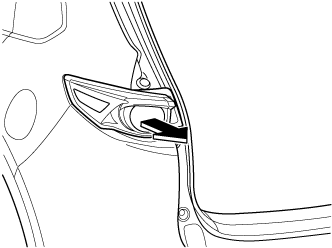
Pull the unit rearward to remove it.
-
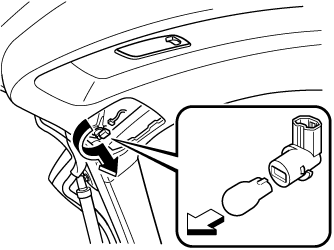
Disconnect the wiring harness by releasing the clamp.

-
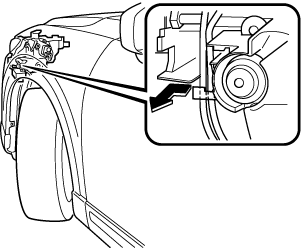
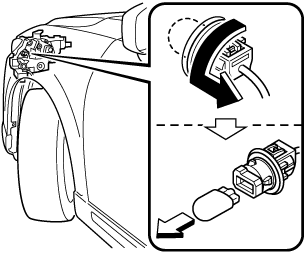
Turn the socket and bulb assembly counterclockwise and remove it.
-
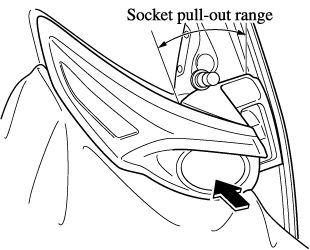
Temporarily install the light unit with the socket pulled out of the top of the light unit.
-
The wiring harness may be damaged when temporarily installing the light unit. When performing the procedure, observe the following points.
-
Pull out the socket from within the socket pull-out range shown in the figure.
-
Do not push the light unit into the vehicle with force.
-
-
When temporarily installing the light unit, cover the rear bumper light unit installation surface with a soft cloth. The rear bumper may be scratched or damaged if the light unit contacts it.
-
-
Disconnect the bulb from the socket.

-
Install the new bulb in the reverse order of the removal procedure.
Reverse lights
-
Make sure the ignition is switched off, and the headlight switch is off.
-
Remove the cover.
-
Disconnect the electrical connector from the bulb by pressing the tab on the connector with your finger and pulling the connector.

-
Turn the socket and bulb assembly counterclockwise and remove it.
-
Disconnect the bulb from the socket.
-
Install the new bulb in the reverse order of the removal procedure.